.svg)


We are excited to share another episode of Data Streaming Quick Tips by Gunnar Morling. The goal of this series is to explain one common task or challenge in the space of stream processing, for example joining data from multiple sources, running time-windowed aggregations, establishing data configurations, and much more. The series will cover upstream open source technologies like Apache Flink, Apache Kafka, Flink SQL, Debezium, as well as Decodable’s approach to stream processing. The episodes will be short and crisp, around 5 to 10 minutes.

Our fourth topic is Change Data Capture with Postgres on Amazon RDS. This article summarizes the video and covers how to set up and configure a Postgres database on Amazon RDS for change data capture (CDC), so you can emit data change streams to tools like Debezium or managed stream processing platforms such as Decodable.
Prerequisites
Before you create a database, you must set up a database parameter group and a VPC security group. The parameter group specifies the type of database you want and how that database should be configured. The VPC security group is used to connect to your database running on RDS securely.
Database Parameters
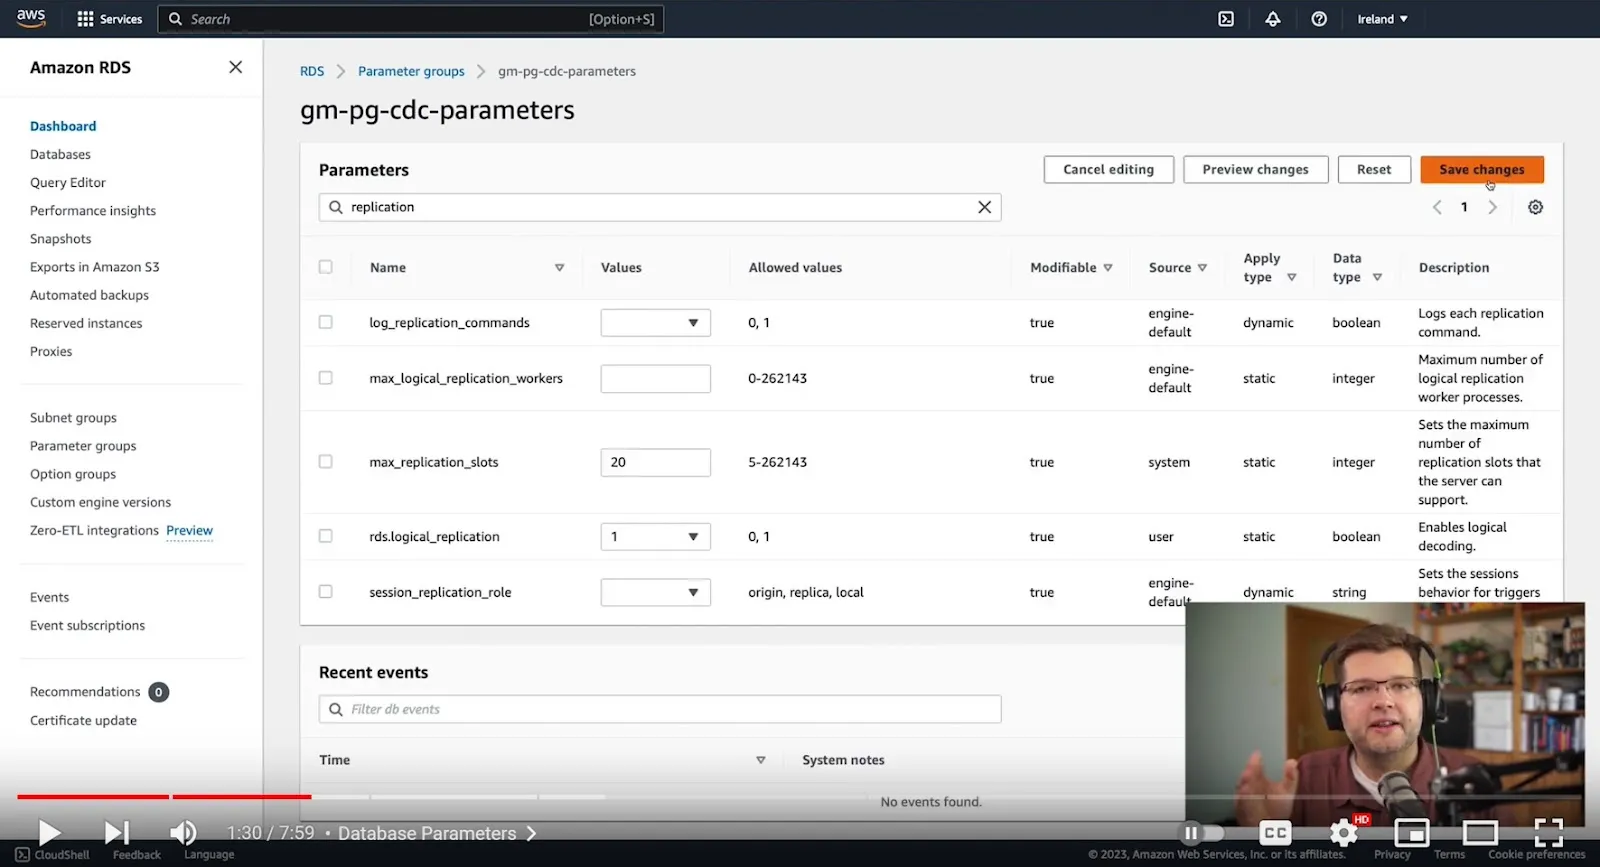
Starting with the database parameters, we need to specify which kind of database we’ll be using. For this example, select Postgres 15. Give your database a name and a description. To set up change data capture, or logical replication as it's called with Postgres, you only need to enable RDS logical replication. To do this, set the rds.logical_replication parameter to 1 (true) in the parameter group. There are other options which could optionally be set; for instance, we could increase the number of maximum concurrent replication slots if we wanted to use multiple connectors at the same time. But really, RDS logical replication is the one single option which is needed in order to use change data capture.
VPC Security Group
The next thing to configure is a VPC security group. Everything on RDS runs within virtual private networks, which means we need to configure accessibility to those resources such as our Postgres database. Navigate to VPC settings and create a new security group. Then we configure inbound and outbound access routes for this security group. In this example, we just need to specify an inbound Rule. To keep things simple, we will allow access to the Postgres port from every possible IP address. Of course, we could lock this down more tightly. Let's say we just wanted to allow access from the Decodable network. In that case, we could specify those documented IP addresses here. But for now, I'm just allowing access from every machine. Once we click create, the security group is in effect.
Create Database
Now it's time to actually create our database. Select the Create button and specify Postgres for the type of database to create. For our demo purposes, we don't really need much in terms of size or bandwidth, so we’ll use the free tier. We need to specify a name and the credentials for our root user. We don’t really care about the storage size, so we’ll disable the auto-scaling.

But what we do care about is the connectivity, so we need to specify public access and select the VPC security group which we set up earlier. Under the database options, we’ll also specify a name for the database, in this case we’ll call it inventorydb. Most importantly, here is where we specify which database parameter group to use. Make sure that you specify the parameter group that you created in the prerequisites. Then, select Create to finish creating the database.
Connect to Database
With our database up and running, we can go ahead and connect to it. With a database shell open using pgcli, the first thing we want to do is verify that our settings are correct. Let’s select from the pg_settings table to view the settings for logical replication and wal_level (write-ahead log). We can see that their values are on and logical, which are correct. The next step is adding some data to experiment with. Let’s create a new table named customers. We’ll specify that this table has a replica identity of full, which means that when we do data updates, we also get the old state of the row as part of those update events. And then to have some example data, we can just insert a few rows into this table.
Now we could connect to this database using our Postgres root user, however, best practices are to use a dedicated account which has the minimal set of required privileges for CDC. So for this purpose, let’s create a new role called cdc_users and specify just the exact set of privileges necessary. It needs to have the usage privilege on our inventory schema, the rds_replication role, and finally select privileges for our sample table so we can do an initial snapshot. Next, we’ll create a user which has this role called cdc_user.
Lastly, we’ll create a publication. This publication controls which tables are contained in the change event stream. So here we’ll create a dedicated publication just for our sample table. We are doing this upfront, but alternatively we could also have the connector do this. However, that option requires adding create permissions for the cdc_users role, which we don’t really need or want. So instead, it’s better to create this publication upfront and have it be used by the connector later on.
Testing the Connection
Alright, so let's finally see whether everything works as expected! For this purpose, I’ve already set up an instance of the Decodable Postgres CDC connector which is based on Debezium.
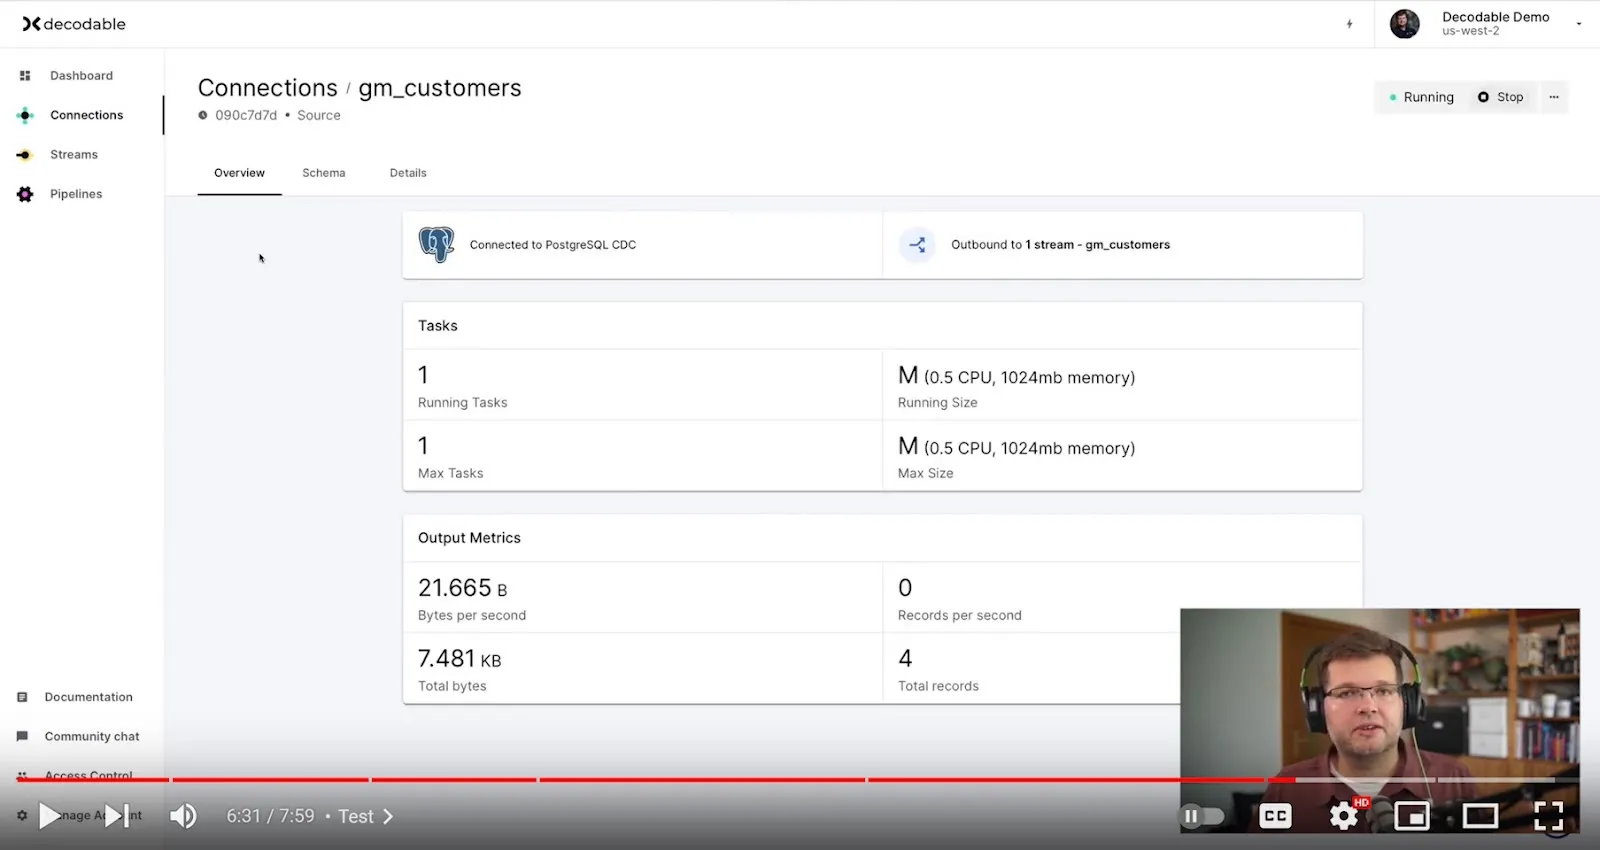
If we take a look at its configuration, we see this is connected to our Postgres database on RDS and it is using our cdc_user account for access. If we take a look at the data already emitted by the connector, we see that this is the initial snapshot data from this customers table that we prepopulated earlier.
Now if we go back to the Postgres shell, we can do a few data changes and see how the events flow. Let’s update the row with key 1004 a few times. When we go back to the Decodable UI and take a look at the stream, we can see that all those changes have been captured just as expected. We can expand the row state and see not only the current state of this row, but also all the previous row versions.
CDC Success
And that's all it takes. We have set up a Postgres database on Amazon RDS and it is configured to use logical replication, which is the Postgres name for change data capture and for exposing change event streams. We can now use tools like Debezium or platforms like Decodable for ingesting and processing those change events.
Additional Resources
- Check out the example code in our GitHub repository
- Have a question for Gunnar? Connect on Twitter or LinkedIn
- Ready to connect to a data stream and create a pipeline? Start free
- Take a guided tour with our Quickstart Guide
- Join our Slack community


